Photography 101 Shoot in Manual 101: ISO
Shooting in manual means that you are familiar with all of the terms in the exposure triangle: Aperture, Shutter Speed and ISO. But what is ISO? This post will help you answer that question and get even more comfortable with shooting in manual.
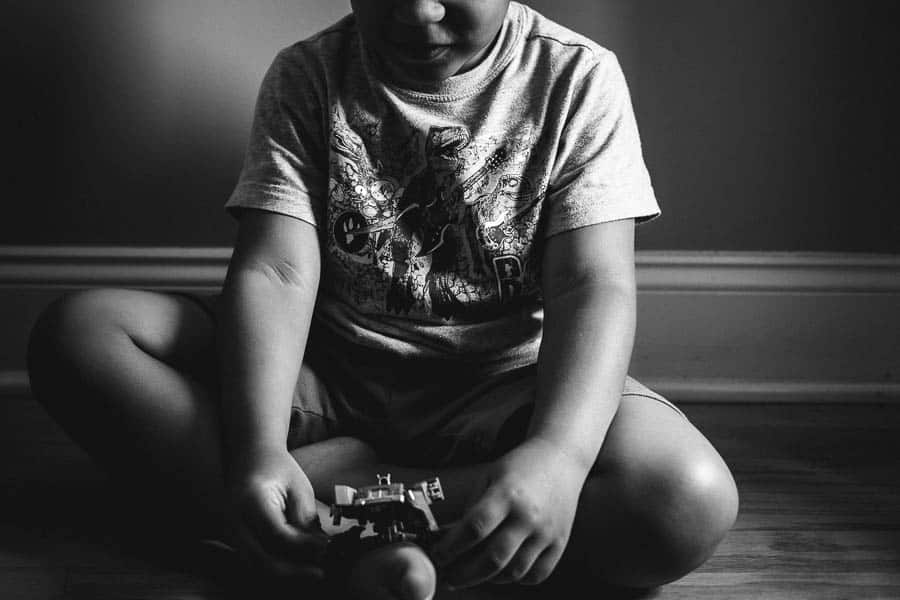
Taken with Canon 6D and Canon 50mm 1.4 Lens
Settings: f 2.5 SS: 1/125 ISO: 3200
Let’s Discuss ISO
The second part of the Exposure triangle that we are going to talk about is ISO. So what IS ISO?
ISO stands for International Standardization for Organization.
When you adjust the ISO, you determine how sensitive the sensor of your camera is to light. There are numbers that correspond to how sensitive your sensor is to light. These numbers usually range from about 100 up to 12800( and even more on some of the newer models). The standard ISO range is 100-6400.
The numbers that are used to indicate your ISO settings are the same ones that are used to identify film speed. Remember when you bought film you had to choose between 100, 200, 800 etc?
No?
Showing my age…Moving. On.
ANYHOO.
A low number such as ISO 100 means that your image is not very sensitive to light. While ISO 3200 means your camera is very sensitive to light.
So if you were outside on a sunny day, your ISO would need to be 100. Because there is lots of light and your sensor doesn’t need to be that sensitive. But if you were in a restaurant with low light, then you might increase your ISO to 6400 because you need your sensor to be more sensitive to light.
Pros and Cons
Low ISO
Taken with Canon 6D and Canon 24mm 1.4 L Lens
Settings: Aperture: f/5.6 Shutter Speed:1/400 ISO: 1/160
Pros: A crisp, smooth, and clean image.
Cons: You can’t really shoot in low light because your sensor is not sensitive enough to light.
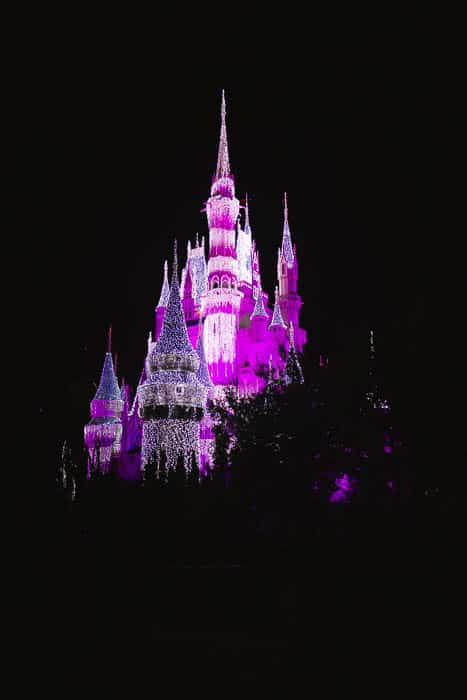
Taken with Canon 6D and Canon 24mm 1.4 L Lens
Settings: Aperture: f/2.5 Shutter Speed 1/320 ISO 6400
HIGH ISO
Pro: you can shoot in low light situations and still have a properly exposed photo.
Cons: a Grainy appearance of your photos. This is what they call “digital noise”. This decreases how sharp your photo looks and the overall quality of your photo.
What to Do about Digital Noise
- Live with it.
- Convert to black and white( grain makes black and white look cool and artistic 🙂 )
- Use noise reduction in Lightroom or Photoshop, but not too much. You don’t want plastic people!
- Expose to the right( this is something I will talk about another time). Basically, you slightly overexpose in camera and bring the exposure down in post-processing. Reducing the amount of noise in your photo. The reason people do this is that if you underexpose a high ISO image, there will be a ton of grain.
A lot of photographers are obsessed with keeping their ISO low so that there is no grain. But life and photos, happen in crappy light. And sometimes you have to crank up that ISO to capture that memory. Remember, the exposure triangle is about balance. You move one element, you change another. Remember:
APERTURE+SHUTTER SPEED + ISO= A PROPERLY EXPOSED IMAGE.
Don’t be afraid!
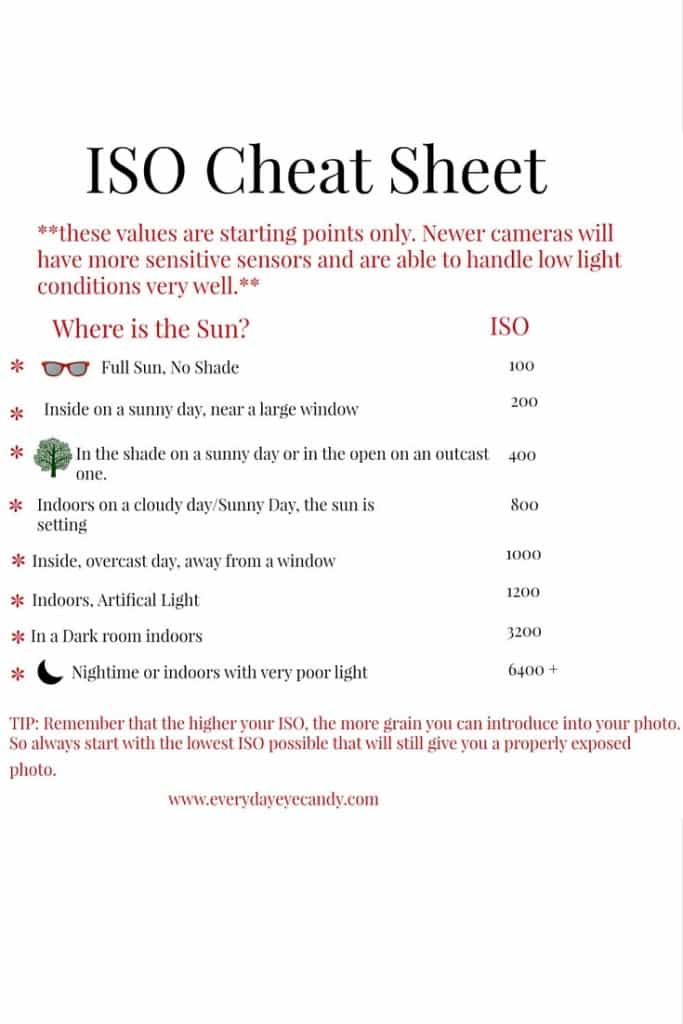
Now of course, I have provided you with a little cheat sheet for your downloading needs that you can download by clicking right here, or just click on the photo.
Stay tuned for tomorrow when we will be talking about Aperture! And if you missed the first two in the series, check them out below! Questions??


You’re amazing. That’s all.
*blushes*
You are amazing and the tips provided by you are valuable and effective. We at Voila Studio are pro in photoshoot whether it is product photography or model photography.