Photography 101 Shooting in Manual: Shutter Speed
Taken with Canon 7D and Tamron 28-75 2.8 lens
Settings: Aperture f/3.2 Shutter Speed 1/1600 ISO 100
First, let’s talk about Shutter Speed.
What is Shutter Speed?
Shutter speed is one of the most important variables in the exposure triangle.
Shutter Speed is the amount of time that your shutter remains open. Yesterday, I told you that you decide how long you want to let light inside of your camera by adjusting your shutter speed. Your shutter speed.
Remember:
A long shutter speed ( also called a slow/low shutter speed)=more light.
A short shutter speed( also called a fast/high shutter speed) = less light.
How is Shutter Speed Measured?
The numbers that tell how slow/long or how fast/short your shutter speed are measured in seconds or fractions of seconds such as the 1/1600 in the photo above. So, the bigger the denominator( number on the bottom) the faster the shutter speed. So a 1/1600 is faster is than 1/60. Shutter speeds that are full seconds long are usually shown as 1( 1 second) or 60 ( meaning 60 seconds).
Do you want to freeze or show motion?
One of the most important questions to ask yourself when photographing subjects that move is: do you want to freeze the movement or show the movement?
A fast shutter speed freezes the motion of a moving subject while a slow shutter speed blurs the motion of a moving subject.
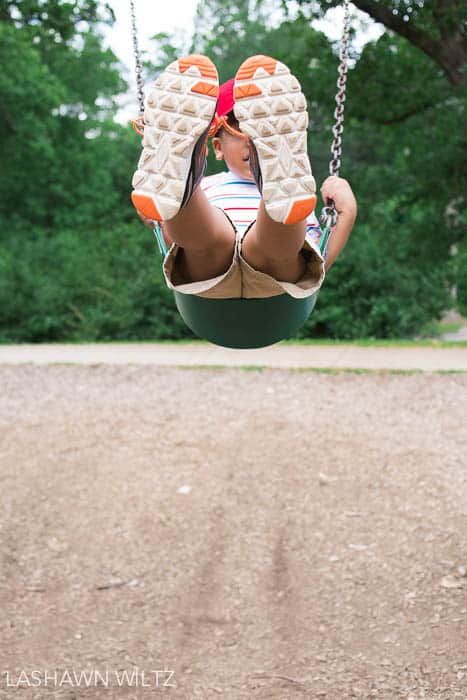
Taken with Canon 6D and Canon 35mm 2.0 lens
Settings: Aperture: f/3.5 Shutter Speed 1/1250 ISO 800
The majority of the time, you want to freeze motion because when you take a photo, you want your photos to be sharp and in focus. If your subject is not sharp and in focus, it can look..a hot mess! So, your goal should be to shoot with a shutter speed that is fast enough to prevent any motion of your subject.
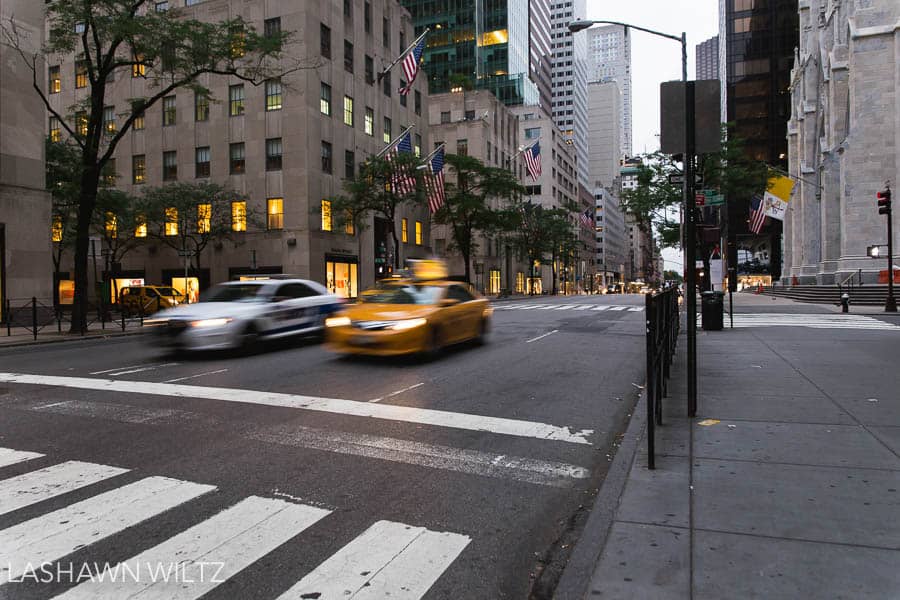
Taken with Canon 6D and Tamron 24-70 2.8 lens
Settings: aperture: f/4.0 Shutter Speed: 1/20 ISO 250
If you do want to imply motion, it looks best if your subject appears as though it is in motion and everything around it is in focus. Like the photo above.
When trying this, remember it is very unpredictable! I took A LOT of photos of the cabs before I got this one that looked like what I was going for.
But look at my settings: I knew I wanted to show the motion, so I lowered my shutter speed to 1/20.( meaning my shutter was open for 20 seconds) But keeping in mind the exposure triangle: I then had to adjust the rest of my settings so that I would get a properly exposed image. So I had to lower my ISO to 250( making my sensor less sensitive to light) and I increased my aperture to 4.0( allowing more light to hit my sensor) so that my shutter could stay open longer increasing the chance of capture the movement of the cab.
Well, that’s all for today! Hope you are not on information overload!!
To help you out, I’ve created a cheat sheet for shutter speed! Just click here for your Shutter Speed Cheat Sheet or click the photo below to download immediately so you can have it in your phone or print out!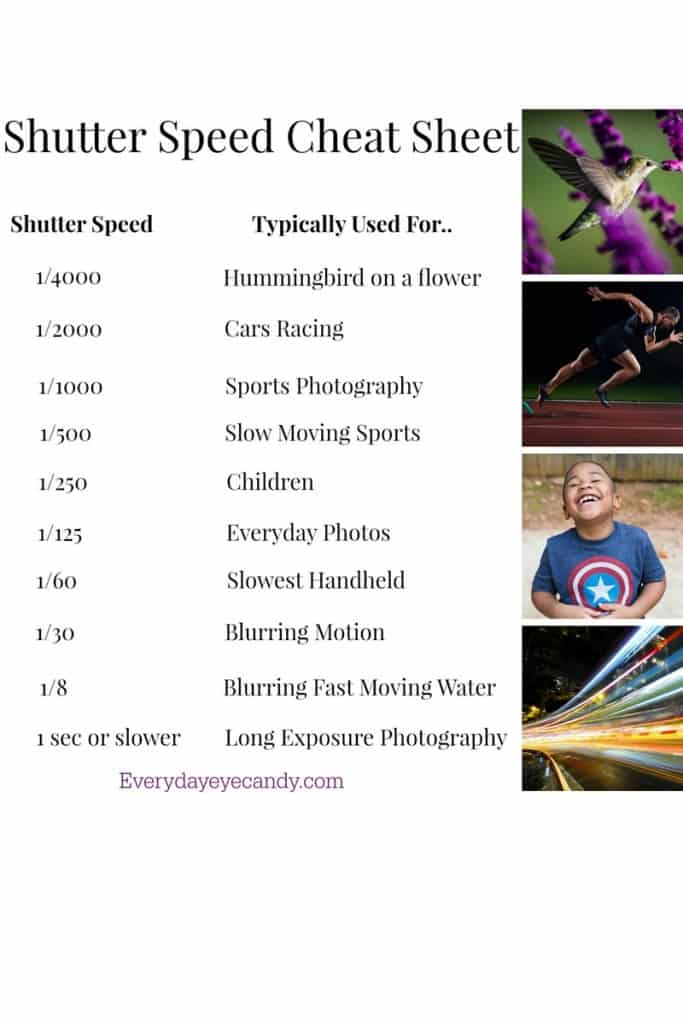 See you tomorrow when we discuss ISO!
If you want to start at the beginning of this series, check out the first post below!
[ess_grid alias=”Introtomanual”]

Excellent article! The aspect of learning photography that was most challenging for me was adjusting apature to match shutter speed. Any tips?
The Iso part needs more clarification especially for beginners. Nice post